UITableViewの使い方めも その1
UITableViewの使い方めも その1。
iOSでテーブルを表示するUI、UITableViewクラスと、プロトコルUITableViewDataSource, UITableViewDelegateについて。
基本的な使い方
UITableViewの基本的な使い方
(1)UIApplicationDelegate継承クラス(ここではTestAppVCとします)を作成します。
UITableViewを所持するクラスを宣言します。UIViewControllerやUIView、UIKitなどの継承クラスでも問題ありません。
(2)TestAppVCクラスのインスタンス変数(myTableView)として、UITableViewを宣言します。
xibファイルと関連づけるため、IBOutletの指定をしておきます。
(3)TestAppVCクラスに最低限必要な実装を行います。
プロトコルは必須ではありませんが、ここではUITableViewDataSource, UITableViewDelegateを採用します。(4)Interface Builderで関連づけを行います。
myTableViewのデータソースやデリゲートの指定を行います。
サンプル
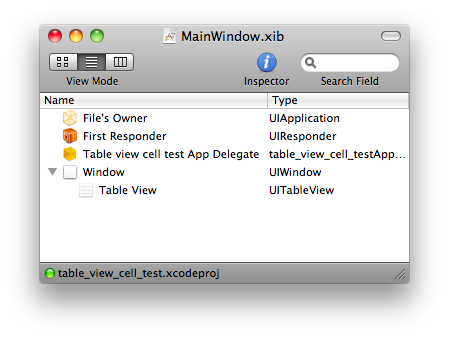
(1)UIApplicationDelegate継承クラスを作成
(2)UITableVewのインスタンス変数
table_view_cell_testAppDelegate.h
#import <UIKit/UIKit.h>

@interface table_view_cell_testAppDelegate : NSObject <UIApplicationDelegate, UITableViewDataSource, UITableViewDelegate>{
    UIWindow *window;
    UITableView* myTableView;
}

@property (nonatomic, retain) IBOutlet UIWindow *window;
@property (nonatomic, retain) IBOutlet UITableView* myTableView;

@end
(3)最低限必要な実装を行います
- レコードの件数を返すメソッド
ここでは5件返します。
(NSInteger)tableView:(UITableView*)tableView numberOfRowsInSection:(NSInteger)section
- テーブルのセルのインスタンスを返すメソッド
テーブルのセルのインスタンスを生成して返します。セルに表示する値もここで設定します。
また、生成したセルはキャッシュされ、スクロールアウトした際に、再利用されます。(テーブルをスクロールしたときに引っかかる感じがなければ、うまくキャッシュされています。)
(UITableViewCell*)tableView:(UITableView*)tableView cellForRowAtIndexPath:(NSIndexPath*)indexPath
#import "table_view_cell_testAppDelegate.h"

@implementation table_view_cell_testAppDelegate

@synthesize window, myTableView;

// ----- 実装を省略 -----

- (NSInteger)tableView:(UITableView*)tableView numberOfRowsInSection:(NSInteger)section {
    // レコードを5件返す。
    return 5;
}

- (UITableViewCell*)tableView:(UITableView*)tableView cellForRowAtIndexPath:(NSIndexPath*)indexPath {
    // cellをキャッシュするときのキー
    static NSString* cellIdentifier0 = @"TableViewCellSample";

    // cellがキャッシュされていれば、再利用する。
    UITableViewCell* cell = [tableView dequeueReusableCellWithIdentifier:cellIdentifier0];
    if(cell == nil) {
        // cellのインスタンスを生成する
        cell = [[UITableViewCell alloc] initWithStyle:UITableViewCellStyleDefault reuseIdentifier:cellIdentifier0];
    }

    // indexPathをもとにcellの値を設定
    NSLog(@"section:%d row:%d", indexPath.section, indexPath.row);

    return cell;
}

- (void)dealloc {
    [window release];
    [myTableView release];
    [super dealloc];
}

@end
- UITableViewCell#initWithStyle
スタイルを指定してUITableViewCellを初期化する。指定できるスタイルは以下の通り。
| UITableViewCellStyleDefault | 左端の画像とテキストを表示 |
| UITableViewCellStyleSubtitle | 左端の画像、テキスト、サブタイトルを表示 |
| UITableViewCellStyleValue1 | 左端のテキスト、右端のサブテキストを表示 |
| UITableViewCellStyleValue2 | サブテキスト、テキストを表示 |
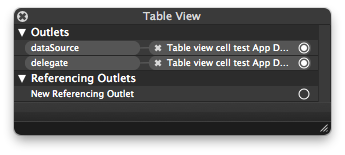
- Table View上で右クリック
dataSourceにUIApplicationDelegate継承クラスを関連づけます。
delegateにUIApplicationDelegate継承クラスを関連づけます。
| dataSource | UITableViewで使用するUITableViewCellの生成や表示するデータの設定などを定義したUITableViewDataSourceのメソッドを実装したクラスを指定 |
| delegate | UITableViewの振る舞い(クリック時や編集時の動作)を定義したUIApplicationDelegateのメソッドを実装したクラスを指定 |
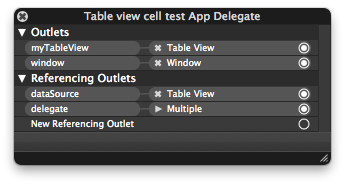
UIApplicationDelegate継承クラス上で右クリック。
myTableViewにUITableVewのインスタンス変数を関連づけます。

以上でInterfaceBuilder上の作業は終了です。
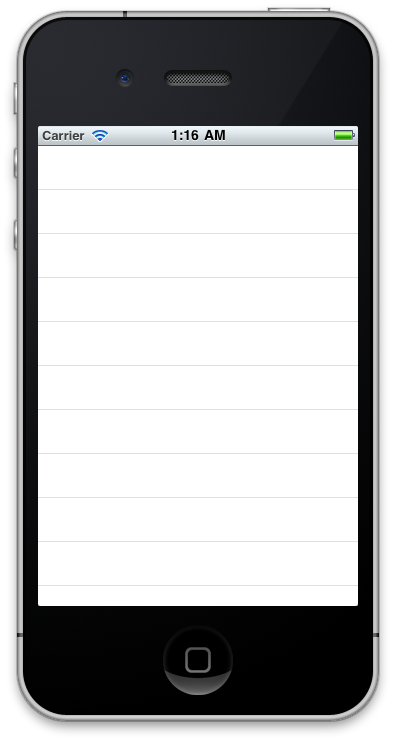
起動すると次のような画面が表示されると思います。

とりあえずここまで。もう少しちゃんとした使い方はまた後でまとめておこうと思います。

